Waldorf Doll – part 3

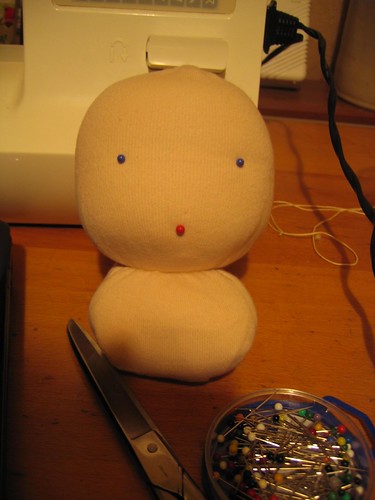
(You can read more about my adventures making my first Waldorf Doll here.)

Hair.

This was the part that I was really nervous about. I knew that I wanted the doll to have a shaggy haircut, because the little boy who’s going to play with him has shaggy hair too. And I think it’s the most appealing ‘boy’ haircut. Particularly for dolls.

But even the book warned that it was pretty much the hardest hairstyle to pull off. So I went in, expect it to take ages. Luckily I read (somewhere on the ravelry waldorf dolls group forum – though I can’t find the exact post now), that someone was using the knitting pattern stitch from Grrr by ‘Housemate Alice‘ (because sometimes the world is that small. 🙂 which I thought seemed like a genius idea.

So I played around with a bit of a swatch to work out my gauge, measured around the head and got stuck in.

Waldorf Doll - Hair (in progress)

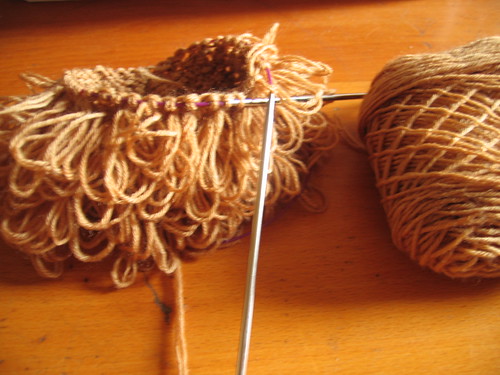
The yarn is Oxford Kitchen Yarn sock yarn in Biscuit (the other half of the ball used to make the Earl Grey Tea and Biscuit sock) which I held double, to get as much hair as I could.

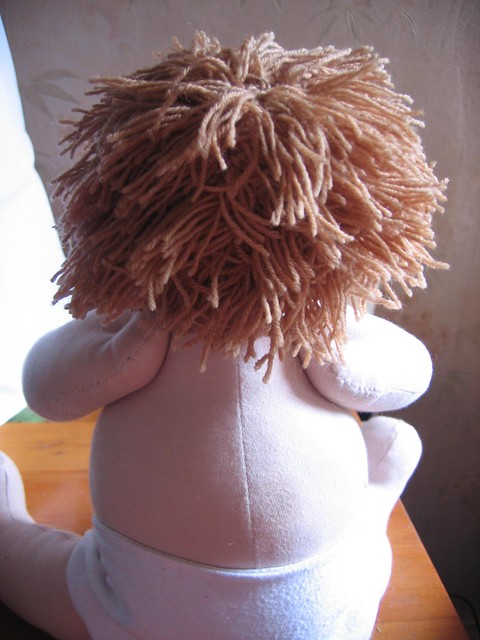
I don’t have an exact pattern – basically the plan is to make a close fitting cap, so I decreased pretty much as I would for a hat, all be it one where I didn’t want the decreases to line up exactly. After a while, with the decreases it becomes a bit of a judgement call as to whether you should knit two loop stitches in a row, or alternate them as usual. But it’s not that hard – I just erred on the side of not wanting any bald spots.

The knitting probably took me a couple of days. The loop stitch looks complicated when you first try it but becomes second nature very quickly so I was able to knit in the garden while FB played without him being any the wiser.

Once the cap was complete I got to do what turned out to be the BEST BIT.

I cut all the loops and suddenly had hair in my hands.
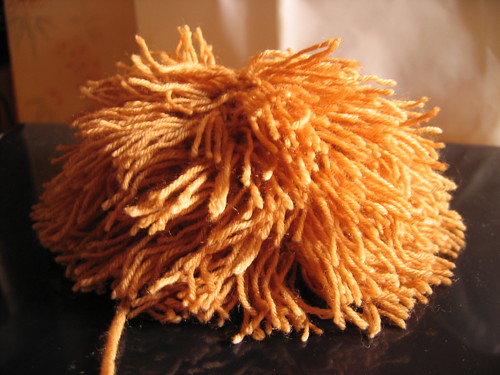
Waldorf Doll - Hair (after cutting the loops)

(Cousin IT?)

After that it was just a case of fitting the cap to the head and sewing it down.

One of the things I love about this stitch is that tugging the hair actually tightens the stitch, so it should be able to handle being played with by a toddler. 🙂

Waldorf Doll - with hair and nappy

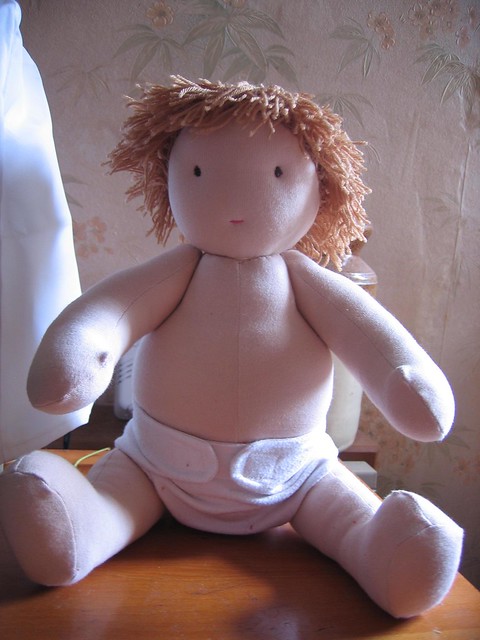
So there you go – I made a boy, with hair!

Waldorf Doll - with hair and nappy

In conclusion – making shaggy doll hair is really not hard. It also didn’t take very long in the grand scheme of things. And it was fun.

And, personally I’m really happy with the results.

More soon.

Waldorf Doll – part 2

(You can read the first post about me dipping my toe into the world of Waldorf Dolls here.)

So last time I posted, the doll looked like this:

Waldorf Doll - part 1

a day or so later (after looking at a lot of other dolls, and working out what I liked and disliked) I sat down and sewed the facial features.

Waldorf Doll - Face

I have to say, it was well worth buying a doll making needle. I did a lot of swapping between that and a decent embroidery needle, depending if I was working through the head, or on the top layer of fabric.

I started and ended at the back of the head, which allowed me to pull both ends of the threads and tie them together (this will be hidden by the hair, and won’t be accessible at all), which helped the eyes sink into the head a bit.

I did the same with the mouth but didn’t pull as tight. The threads are just normal 6ply embroidery threads, spilt into 3 threads for the eyes and 4 for the mouth (I think.)

Next up, I cut out all the body and limb pieces and set about making the body.

Waldorf Doll - cut out

Once that body had come together I tucked the shoulders into the body and sewed the neck to the top edge of the body.

Waldorf Doll - skittle!

You could make really labour intensive skittles this way! 🙂

Getting the stitches neat led to a lot of turning the body upside-down to pick up the sewing stitch on one side and turning it the right way round again to pick up the stitch on the otherside.

However it was worth taking the time, since I ended up with a neat neck edge.

Waldorf Doll - neat neck stitches

The limbs were fiddlier to sew, but really it’s just a case of taking your time.

Once they were all sewn and stuffed I set about sewing the limbs onto the body. FB is going to be two, so I was working on a jointed doll. Even though I was a bit intimidating, it turned out to be fine.

Again it would have been much harder to do without the doll making needle but it turned out that sewing the eyes and sewing the limbs on was a very similar process.

Basically you send a length of crochet cotton through the arm, and the body and out the other arm, they you repeat the process again but about 1cm lower that the first thread. Then you do the same thing again very close to each of those two threads – so you have two pairs of threads – an upper pair and a lower pair. You knot these four threads together at one side, and then you pull the other four threads tight on the other side, so that the arms pull in tight to the body (this sets them into the body and makes the shoulders), and thenn knot those four threads together.

I then took each end of thread separately and finished them off so that the ends were inside the limb, and both arm joints looked really neat.

I did exactly the same with the legs, although I ended up repositioning the legs because the first time I set them too high and the doll didn’t sit down well. But repositioning was pretty easy – I just carefully snipped one of the knots, trying not to damage the leg fabric as I went.

And I ended up with this:

Waldorf Doll - All sewn up

He’s very huggable and it’s very hard to put him back into the drawer when I’m done sewing for the day.

Next time I’ll show you the hair I made.

Next Post – and a scary project

… I chickened out on showing you my new dye space.

For now.

I’m going to get it up and running, and make it look a bit prettier and then I’ll show it to you. In the meantime I’m sorting out what is going into the sale on the 26th. Stay tuned.

In other news, FB is going to be two (two!) in the middle of October, and though my midwife is convinced I’m not going to drop until week 41 (which is a week after his birthday. Yes. I know.)  I’m hard at work trying to get his birthday, and Christmas generally well under way with plenty of time to spare.

With that in mind I stayed up far too late last night to start work on the Waldorf doll that I’m making him. I’ve been wanting to have a go at one of these for AGES, but I’d heard they are tricky, and kept putting it off. However I’d really like FB to have a little buddy who he can go on adventures with, so I’m giving it a go.

I’ll do my best to document how it goes here, for those who are interested. Maybe it won’t be so scary, and others will decided to have a go too? Here’s hoping.

I’m working from Making Waldorf Dolls by Maricristin Sealey, which is a great book and a classic if you want to make these sorts of dolls. I got my supplies from Myriad Online, which is a great resource for natural toys and Waldorf books if you’re based in the UK.

Anyway a couple of hours at my new sewing table and here’s what I have so far:

Waldorf Doll - part 1

It was relatively painless. Even without a third hand to help tie the knots. I’m really pleased with how smooth the face is (no bunching!) though the eyeline isn’t a pronounced as maybe it would be with more practice.

Anyway more on that soon (ish.)